If you dream of achieving that perfect, sleek, and straight look, you are in the right place.
Our Häste Urban Hair Spa expert stylists, who have mastered the art of blow drying, are here to guide you on your journey to flawless hair.
With this step-by-step guide, you will quickly master the art of blow-drying straight, sleek hair. You will then have the smooth, polished finish you desire, like when you leave our spa.
So, let’s begin your journey to feel confident and fabulous with flawless hair.
How to Blow Dry Like a Pro

Compared to air-drying hair, which tends to result in bumps and waves, blow-drying gives you more control over your strands and allows you to style them.
When you master blow-drying your hair for a straight, smooth look, you gain control and manageability, empowering you to create the desired styles.
But what is the big secret to blow-drying straight and sleek hair? It’s all in your haircare products and the blow dryer’s concentrator nozzle.
How to Blow Dry Hair Straight

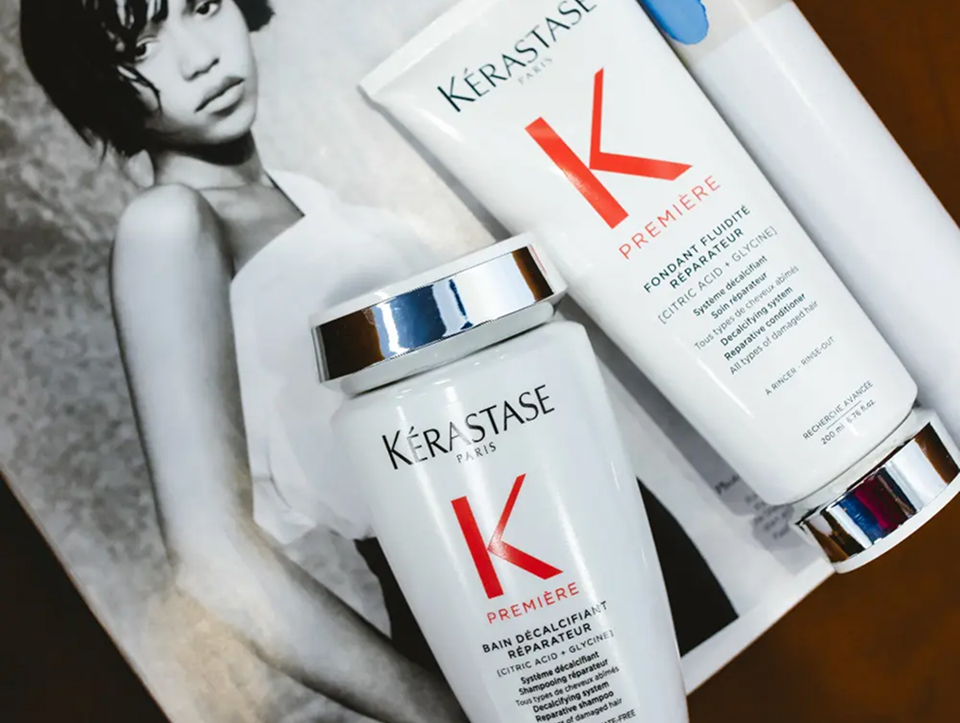
If you dream of straight, sleek strands, we recommend investing in the Kérastase Kératine Thermique Discipline blow-dry milk.
The product provides heat protection for unruly hair by sealing the hair fiber’s scales, protecting it from the damaging effects of styling tools. The blow-dry milk has anti-humidity and anti-frizz properties, leaving the hair smoother.
Step 1: Prep Hair
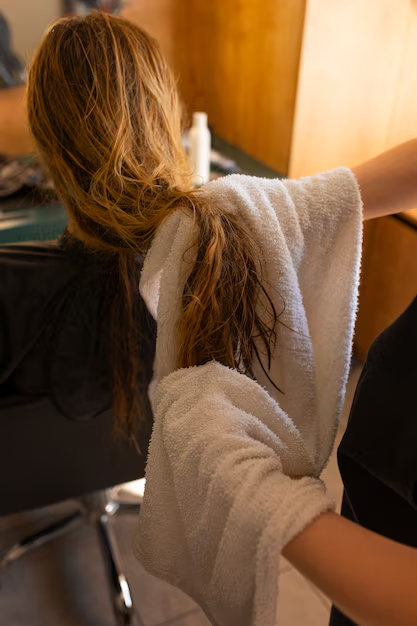
After towel-drying your hair, gently massage the blow-dry milk into the lengths and ends to protect it from heat damage and achieve a glossy look.
Step 2: Blow Dry Product Into Your Hair
Take your brush and gently brush out your hair to allow the product to work its way into the strands. Then, take your hair dryer to blow-dry the blow-dry milk into the hair.
However, direct the airflow downwards, following the length of your hair, to achieve a smooth finish. Then, use your hands to work through your tresses until your mane is 80% dry.
Step 3: Section Your Hair and Secure
Now, draw your fingers from the back of the ears to section the top half of the hair. Secure a clip on your crown to smooth out the bottom section first.
Step 4: Position the Brush Underneath a Small Piece of Hair
Take a small piece of hair from the bottom section, position a vented radial brush (size 3) underneath, and close it to the root. Then, twist slightly with your wrist away to help increase the tension on your hair.
Step 5: Blow Dry Your Hair With The Airflow Traveling Down
Hold your hair dryer three inches above your brush to ensure the airflow travels from the root to the tip. Slowly pull your brush towards the hair ends, then follow with the hair dryer.
Step 6: Roll Brush From The Ends to Blow Dry From Above
Once you reach the ends, roll your brush away from you to blow dry from above and increase the tension of the hair for a smoother finish.
Step 7: Continue These Steps Around Your Head in Sections
To blow-dry straight and smooth hair, work in sections using a smooth technique with your hairdryer and brush to achieve a natural finish.
Step 8: Finish With Your Fringe
To achieve a sleek blowout for your fringe, start by positioning your brush at the roots of your hair and gently rolling it outwards and away from your face as you blow-dry.
Next, use a hairdryer to blow-dry the bangs from underneath, keeping the dryer three inches away from your hair.
Then, rub some smooth and finish serum into your palms and rub them together. Run your hands through your tresses from the root to the tip for a polished finish.
How to Blow Dry Your Hair Without Frizz

Use the Kérastase Sérum Filler to protect and slay those strands if you have frizzy hair. Then, follow the same steps for blow drying your hair straight by applying the frizz serum from your mid-shaft to the ends. Use a detangling brush or comb to distribute the product and follow the previous steps.
How to Blow Dry Hair For Volume
Adding some life can revive flat-feeling hair, making it look and feel thicker. We recommend styling your strands with Kérastase Thickening Mousse, a volumizing foam.
It will nourish your hair from root to tip and is long-lasting. Follow the same steps by adding two to three pumps of the mousse to your hands and applying it in sections.
Start working from the roots down to the ends and blow dry as described in the previous sections. Alternatively, you can always go for the beach wave look or learn here how to do a voluminous blowout.
How To Achieve a Perfect Salon Quality Blowout

For a salon-quality blowout, we recommend the following:
Quality Brush
The first step is choosing a brush based on the results you want to achieve. These include the following hair brushes:
- Round Brush: For adding volume and curl, the round brush is typically 1 to 2 ½ inches in diameter, depending on the desired level of volume and curl. The bigger your brush, the smoother you can blow-dry your hair.
- Boar-Bristle: Using a boar bristle brush is the gold standard for achieving polished strands. The brush stimulates your scalp while increasing the hair follicles, giving your hair some TLC.
- Ceramic Brush: The brush generates an ideal temperature for heat styling. Your hair remains soft yet easy to style. Furthermore, with time, the brush helps with less damage to your hair.
- Ceramic Coated Barrel Brush: This brush is suitable for all hair types and helps reduce heat damage, as the ceramic material helps retain heat to dry the hair faster.
Quality Blow Dryer
To blow-dry your hair daily, you need a quality hair dryer that offers various functions to help minimize damage.
Choose a blow dryer with multiple settings, from excellent airflow to help close hair cuticles and iconic technology.
Look for a blow dryer with multiple heat and speed settings, a cool shot button, and ionic technology to reduce frizz and enhance shine.
There are also tons of affordable hair protection options available.
Use Styling Products
Remember to prepare the hair with a top-notch styling product and ensure it is evenly distributed. Invest in heat protectants, such as smoothing serums and texturizing liquids, regardless of the hot tool you use. Part your hair into sections and work in the product from the mid-shaft to the ends with a comb or your fingers.
Blow Dryer Nozzle
Use the nozzle that comes with your blow dryer to direct concentrated heat downward on the hair shaft. Your damaged hair will become smooth and shiny.
The nozzle helps concentrate the airflow, allowing you to style your hair with greater precision. To achieve a glossy effect, point the nozzle downwards to allow the cuticles to close.
If you prefer a messier texture look, then blast from underneath, as this allows you to achieve different blow-dry styles.
6 Mistakes to Avoid Blow Drying Hair Straight and Sleek
1. Using a High Heat Setting
Yes, we know you want to get the job done quickly, but using the high setting for blow-drying is unhealthy for your hair. Adjust the heat and airflow settings according to your hair type.
For thin hair, use a low to medium heat setting; for thicker hair, select a higher heat setting with lower airflow. Always finish your blow-drying with cool air for a shine, regardless of the heat setting you use.
2. Use The Right Brush
For a straight blow, you need to create tension in the strands. When the brush bristles are too far apart for your hair, the shaft will return to its original form.
The same applies to using a round brush, as it creates excessive tension on the strands, causing significant damage when the hair is wet. For a smooth result, choose a brush with loads of surface area.
A large brush provides your hair with enough room to dry, allowing you to still smooth it out with gentle brushing. We recommend a nylon or boar bristle brush.
3. Skipping Your Styling Products
It is essential to prep your hair strands by applying heat protectants before applying heat. A lack of heat protection can lead to damaged hair, so invest in a blow-dry primer and volumizing mousse.
4. Avoid Products That Dry Your Hair
If you have fragile hair, we recommend avoiding products with ammonia, detergents, and polymers. The chemicals strip your scalp and your hair of natural oils.
5. Not Blow Drying From The Root to Tip
You must blow-dry from the roots to the tips because this is how your hair grows. Working against the growth will open the cuticles on the hair shaft, leading to frizz. To fuse the cuticles, blow dry from the root to the tip, as it will add a shine to your hair.
6. Not Having Patience
To blow-dry straight and sleek takes patience and time. It results in chaos when you try to rush through it too quickly. Leaving the hair to cool on your brush before moving to the next section will allow it to set. Take your time to get a smooth and shiny finish.
Wrap-Up: Steps to Blow Dry Hair Straight and Sleek
Congratulations! You have now mastered the art of blow-drying your hair straight and sleek. With the proper techniques and products, achieving that smooth, polished finish is within reach.
Remember, practice makes perfect, and soon, you’ll be able to recreate that salon-quality look at home.
Are you ready to take your hairstyle to the next level? Book an appointment at Häste Urban Hair Spa today, and let our expert stylists pamper you with professional blow-dry services or a new haircut.
Experience the difference and step out with confidence and style. We can’t wait to see you.
FAQ
How long does a blow-dry last?
The time a blow dry lasts depends on the state of the hair, the stylist, and when it was done. Natural curly hair with a bouncy blowout can last up to three days, while natural fine or straight hair can last up to a day.
How can I prolong my blow-dry?
Avoid humidity and moisture to help prolong your hair’s dry time, as they can cause frizz or drooping.
How can I preserve my blow-dry overnight?
Gather your hair into a messy bun to preserve your blow-dry overnight before bed. We recommend using a hair tie that will not cause creases. A crunchie works well, as does a claw-style hair clip.
Does blow-drying damage your hair?
Yes, heat can damage your hair, so it’s best to use a low heat setting with a heat protectant product to prevent it from drying out.


